Join Workshops
Physical Address
304 North Cardinal St.
Dorchester Center, MA 02124
Things to Consider Before Laser Engraving Silicone & Rubber
Laser engraving silicone and rubber can be tricky, especially if you’re new to laser crafting.
Have you ever faced issues like inconsistent results, material damage, or misaligned designs?
You’re not alone. In my early days, it took more than a month to understand how to engrave on rubber and silicone workpieces properly.
This guide tackles these common problems and provides clear, actionable solutions to ensure your silicone and rubber engraving projects turn out perfectly every time.
Key Takeaways
- Understand the unique properties of silicone and rubber before engraving.
- Choose the right laser settings for consistent results.
- Follow safety precautions to prevent damage and ensure a smooth process.
- Use proper ventilation to avoid harmful fumes.
- Test on a small piece before committing to a full project.
- Select the appropriate laser type for the best results.
What Properties of Silicone and Rubber Should You Know?

When engraving silicone and rubber, it’s crucial to understand their inherent properties.
Silicone is heat-resistant and flexible, making it ideal for various applications. For instance, talk about the Apple watch wrist stripe.
On the other hand, rubber is durable and often used for industrial purposes. Think about a rubber stamp or the gasket of your fridge.
In my 10+ years of laser engraving practice, I’ve found that these properties greatly influence the outcome of the engraving.
Here’s a table that shows different types of rubber and silicone along with respective laser engraving challenges and solutions to each of them.
| Material Type | Common Challenges | Engraving Tips and Solutions |
|---|---|---|
| Silicone | ||
| – Medical Grade Silicone | Inconsistent depth, potential for burning | Use low power settings (10-15%), moderate speed (300-400 mm/s). Ensure proper ventilation to avoid fumes. |
| – High-Temperature Silicone | Movement during engraving due to flexibility | Secure material firmly. Use lower frequency to prevent material shift. Test on a small piece first. |
| – Food Grade Silicone | Residue buildup, potential for uneven engraving | Clean surface thoroughly before engraving. Use a CO2 laser with lower power and slower speed for precision. |
| Rubber | ||
| – Natural Rubber | Excessive smoke and debris, risk of burning | Use a fume extractor. Set laser to moderate power (15-20%) and speed (350-500 mm/s). Clean regularly. |
| – Neoprene | Emission of toxic fumes, uneven surface finish | Ensure excellent ventilation. Use a CO2 laser. Test settings on a small piece to find optimal parameters. |
| – EPDM Rubber | Melting and charring at higher power levels | Start with low power settings (10-15%), higher speed (400-500 mm/s). Avoid prolonged exposure to laser. |
| – Viton Rubber | Harder material, may require higher power | Gradually increase power settings. Use multiple passes with lower power to avoid burning. |
Common Challenges in Silicone and Rubber Engraving
Engraving silicone and rubber comes with its own set of challenges such as maintaining a constant cutting depth with set precision.
Silicone’s flexibility can sometimes cause the material to move slightly during engraving, leading to blurred designs.
Rubber, being more rigid, can emit a lot of smoke and debris, which can block the laser path and affect the engraving quality. The air pressure settings may become wrong while engraving rubber as too much air may overburn the rubber blank.
Managing these challenges requires a combination of the right settings, proper material handling, and frequent cleaning of the laser equipment.
What Laser Type Is Best for Engraving Rubber and Silicone?
Different lasers suit different materials. CO2 lasers are the best choice for silicone and rubber. They cut and engrave non-metallic materials with precision.
I’ve consistently found that CO2 lasers produce the cleanest cuts and most detailed engravings. However, infrared lasers provide excellent engraving on silicone.
Laser Types:
- CO2 Laser: Ideal for rubber and silicone. They create intricate designs on silicone wristbands and detailed logos on rubber stamps.
- Fiber Laser: Used for metals. Not recommended for rubber and silicone as it may cause burning and uneven engravings.
- Diode Laser: Suitable for softer materials. May lack the power needed for clean engravings on rubber. Works well for shallow engravings on silicone.
- Infrared Laser: Effective for certain plastics. Not ideal for rubber or silicone due to its higher wavelength.
How Does Laser Wavelength Affect Rubber Engraving?
The wavelength of the laser affects engraving effectiveness. CO2 lasers, with a wavelength of 10.6 micrometers, are highly effective for engraving rubber and silicone.
This absorption ensures clean cuts and detailed engravings. Fiber lasers, with a wavelength of 1.06 micrometers, are better for metals but less effective for rubber and silicone.
In a nutshell, CO2 lasers are machines you are looking for that provide 10.6 micrometers of laser wavelength.
Which Laser Settings Are Best for Engraving?
Choosing the correct laser settings is essential.
For silicone and rubber, adjust the power, speed, and frequency settings on your laser engraver per the type of your blank.
Too much power can burn the material and a low power won’t give you proper depth.
Similarly, using too much speed might not engrave deeply enough. Start with moderate settings and fine-tune based on test engravings.
Recommended Settings:
- Power: 10-20%
- Speed: 300-500 mm/s
- Frequency: Low for silicone, higher for rubber
Why Is Ventilation Important?
Ventilation is crucial. Both silicone and rubber can emit toxic fumes when engraved. Inadequate ventilation can lead to health risks and poor air quality in your workspace. According to OSHA, proper ventilation can significantly reduce exposure to harmful substances.
We recommend using laser engravers like xTool P2 that come with proper ventilation and a fume extractor.
Ventilation Guidelines:
- Use a dedicated fume extraction system.
- Work in a well-ventilated area.
- Regularly clean and maintain your fume extraction equipment.
How to Ensure Safety During the Engraving Process?
Safety is paramount. Engraving silicone and rubber can release harmful fumes. Work in a well-ventilated area. Use protective gear like safety glasses and gloves. Adhering to safety protocols helps prevent health risks and ensures a smooth engraving process.
Safety Tips:
- Use a fume extractor or ensure good ventilation.
- Wear protective eyewear and gloves.
- Keep a fire extinguisher nearby.
What Is the Importance of Testing Before Full Engraving?
Testing on a small piece of material can save you time. It prevents costly mistakes. Fine-tune your settings to ensure the final product meets your expectations. Initial testing can significantly enhance the quality and accuracy of the final engraving.
Testing Procedure:
- Cut a small piece of the same material.
- Apply your chosen settings and engrave a test pattern.
- Adjust settings based on the test results before proceeding with the full project.
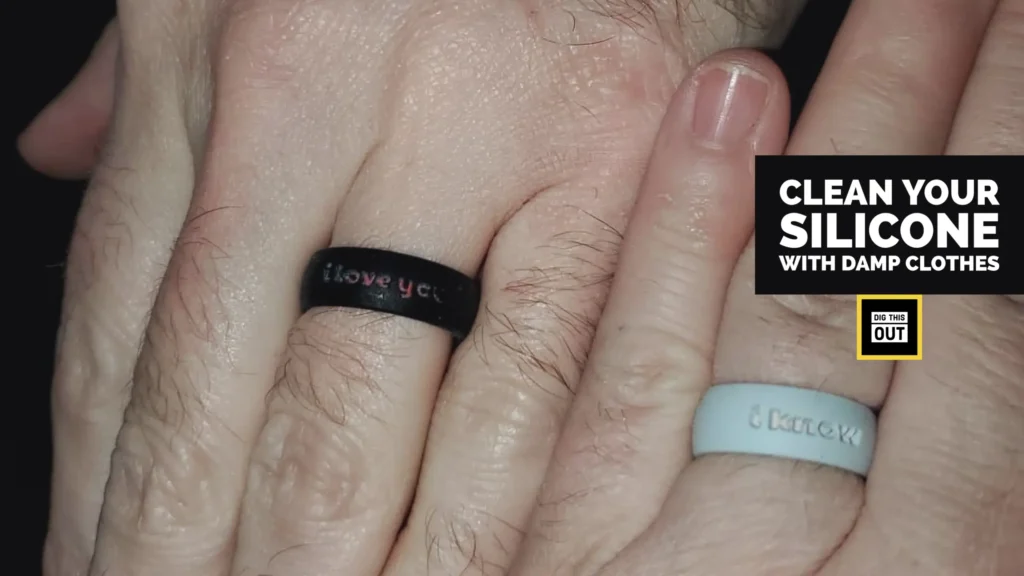
Personal Experience: Engraving silicone wristbands
One memorable project involved engraving silicone wristbands. The client wanted a detailed monogram on the straps.
Using a CO2 laser, we started with a power setting of 15% and a speed of 400 mm/s. After testing on a small piece, we adjusted the frequency to 500 Hz.
The result was a beautifully engraved strap that met the client’s expectations.
Here’s a picture of our experiment:

How to design your image for silicone engraving?
Designing the perfect image for engraving on silicone requires attention to detail and understanding how various factors influence the final result.
Image design indeed matters.
Consider how the design elements will interact with the silicone’s unique properties.
Here are some tips to help you create an image that’s not only visually appealing but also engraves well on silicone:
- Silicone engraving shows up best when you use high-contrast images. Black and white images are ideal. Colors won’t translate into engraving shades, so ensure your image has clear, distinct black-and-white areas.
- Detailed designs can be tough to reproduce on silicone, especially if the engraving area is small. Simplify your design to include only the essential elements that can be easily distinguished once engraved.
- Thicker lines tend to engrave better on silicone. If your design includes lines, make sure they are not too fine or complex, as they may not show up clearly or could blend after engraving.
- Vector graphics are best for engraving because they can be scaled without losing quality. Programs like Adobe Illustrator or Inkscape can help you create vector images that will keep their clarity when resized.
- If you are using a raster image, like a photograph, ensure it has a high resolution. A resolution of at least 300 DPI (dots per inch) is recommended for a clear engraving.
- Choose the right image mode for engraving. For silicone, you might find that ‘Threshold’ mode works well, as it creates a clear binary image of either black (laser fires) or white (laser off).
- This setting helps to create a more photo-like engraving with varying shades of gray. However, with silicone, it’s often best to stick with solid black and white.
- If your image lacks clarity, apply a sharpening filter in LightBurn. Be careful not to overdo it, as too much sharpening can make the image
Frequently asked questions
Can you laser engrave any type of silicone and rubber?
Most types can be engraved, but it’s best to test a small piece first. Some materials may react differently.
What are the best uses for laser-engraved silicone and rubber?
Engraved silicone is popular for customized kitchen utensils, medical devices, and promotional items. Rubber engravings are often used in stamps, industrial components, and gaskets.
Which laser type is most effective for rubber engraving?
CO2 lasers are the most effective for rubber engraving due to their precision. Infrared lasers work fine for thin designs with limited depth.
How do I maintain my laser engraver for optimal performance?
Regular maintenance includes cleaning the lens and mirrors, checking the alignment, and ensuring the ventilation system is functioning properly. Refer to your laser engraver’s manual for specific maintenance instructions.
Conclusion
Engraving rubber is fun if you know the material properties and adjust the laser settings of your engraver. If you are running a small laser engraving business, it would be ideal for you to launch a new product line with silicone and rubber engravings that generates more than 100% profit margin with very minimal effort.


