Join Workshops
Physical Address
304 North Cardinal St.
Dorchester Center, MA 02124
Best Laser Engravers For Leather
You may use both diode and CO2 laser to cut or engrave leather. In both cases, the approximate cost would be $500 to $2000 depending on capacity and other functions.
Choosing the best laser engraver for leather is challenging. Especially, if you have minimum knowledge about the critical areas of a laser engraver.
This article focuses on various aspects of leather engraving with a laser cutter such as scope, difficulty, technical areas, procedures, and a lot more.
We have tested more than 17 different laser engravers on various types of leather and this is the top-voted one that we are suggesting. Besides, the overall screening process had 19 surveys and an 8-step examination process by true leather engraving enthusiasts.
What are the best laser engravers for leather?
We have made a shortlist for the best laser engraver for leather. We considered several parameters such as the ability to handle different types of leather, inclusion of an air assist kit, precision, engraving speed, and many more before recommending.
These are the best laser engravers for leather:
- xTool P2 (Best overall)
- LaserPecker 4
- xTool S1
- Atomstack A24
- Atezr P10 Combo (Best for Budget people)
Quick Comparisons
Here is a quick comparison of the laser machine suitable for leather engraving:
| Laser Power | Engraving Speed | Spot Size | |
| xTool P2 | 55W (CO2) | 600 mm/s | 0.15×0.2mm |
| LaserPecker 4 | 10W (diode) + 2W (IR) | 2000 mm/s | 0.01 mm |
| xTool S1 | 20W / 40W diode | 4000 mm/s | 0.08 x 0.10 mm |
| Atomstack A24 | 24W diode | 600 mm/s | 0.06*0.08mm |
The xTool P2
The xTool P2 is a high-powered, 55W CO2 laser cutter known for its impressive engraving speed of over 600 mm per second. It features advanced capabilities such as curved engraving and intelligent batch processing, making it a standout choice for leather engraving.
The P2’s motorized pass-through allows for engraving on longer materials, and its high precision ensures detailed, accurate results. This combination of power, speed, and innovative features makes the xTool P2 an excellent option for both hobbyists and professionals.

Find detailed specifications and the official price of xTool P2 here.
Positive Sides of xTool P2
- High Laser Power: The 55W CO2 laser tube is more powerful than many competitors, including the Glowforge Pro, allowing for deeper and faster engraving.
- Intelligent Batch Processing: Saves time and boosts efficiency by automatically detecting shapes and placing designs for multiple pieces.
- Curved Engraving: The unique capability to engrave on curved surfaces, facilitated by dual 16-megapixel cameras.
- Motorized Pass-Through: Enables engraving on longer materials, increasing versatility.
- High Speed: Engraving speed of 600 mm/s, faster than many other CO2 lasers.
- Precision: Engraves at an accuracy of 0.001 mm and 1000 DPI, ensuring detailed and vibrant designs.
- Air Assist and Water Chiller: Improves engraving quality and extends laser tube life by reducing smoke and cooling the laser.
- User-Friendly Software: Compatible with xTool Creative Space and LightBurn, offering flexibility in design and control.
Negative Sides of xTool P2
- New to Market: As a newer entrant in the CO2 laser industry, long-term reliability and glass tube replacement services are not fully established.
- Slat Bed Design: The anodized slat bed may limit smaller jewelry engravings due to the gap between slats.
- Plastic Exterior: While it looks premium, the exterior is made of plastic, which might be less durable compared to metal.
Comparison Summary with Glowforge
xTool P2 vs. Glowforge Pro
- Laser Power: xTool P2 has a 55W CO2 laser compared to Glowforge Pro’s 45W, offering more power for faster and deeper engraving.
- Work Area: xTool P2 has a larger work area (26.7” × 14.1”) compared to Glowforge Pro (279mm deep / 495mm wide), accommodating larger projects.
- Pass-Through Cutting: xTool P2 features motorized pass-through for longer materials, which Glowforge Pro lacks.
- Rotary Axis: xTool P2 comes with a rotary axis (RA2 Pro) for cylindrical objects, while Glowforge Pro does not support this feature.
- Software Compatibility: xTool P2 supports both xTool Creative Space and LightBurn, while Glowforge Pro relies solely on its proprietary software.
- Cameras: xTool P2 has two 16-megapixel cameras for better focus and monitoring, compared to Glowforge Pro’s single wide-angle and macro cameras.
- Speed and Precision: xTool P2 offers a higher engraving speed (600 mm/s) and greater precision (0.001 mm) than Glowforge Pro.
- Air Assist and Water Chiller: xTool P2 includes these features, enhancing engraving quality and laser tube longevity.
Laserpecker 4
The LaserPecker 4 is an advanced laser engraver featuring a unique combination of a 10W 450 nm blue diode laser and a 2W 1064 nm infrared laser. This dual-laser system allows it to handle a wide range of materials, making it a versatile and powerful tool for engraving, scoring, and cutting.
Its compact design, combined with high-speed performance (up to 2000 mm/s) and a user-friendly LED touchscreen, makes it an excellent choice for desktop use.
For leather engraving, the LaserPecker 4 stands out due to its precise control, high resolution, and the ability to switch between lasers to optimize for different textures and finishes, ensuring detailed and high-quality results.
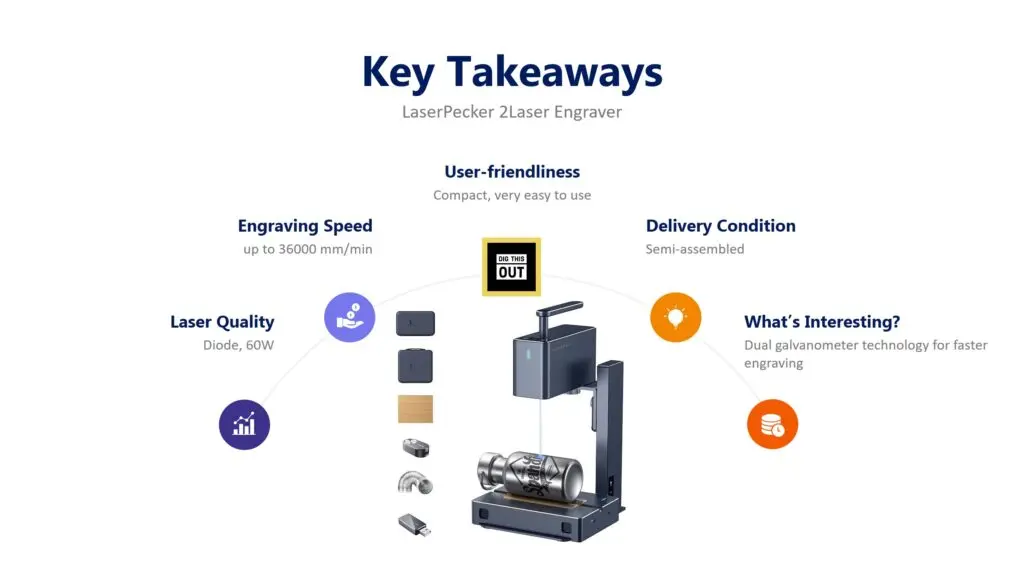
Here are the detailed specifications and Official Price info of LaserPecker 4.
Positive Sides of LaserPecker 4
- Dual-Laser Technology: Combines a 10W blue diode laser and a 2W infrared laser, offering versatility in engraving a wide range of materials, including leather.
- High Speed: Engraving speed up to 2000 mm/s allows for quick and efficient work.
- Precision: High-resolution capabilities (up to 8K) and granularity of 0.003 mm ensure detailed and sharp engravings.
- Compact Design: Small footprint makes it ideal for desktop use, fitting easily into small workspaces.
- Ease of Use: Features a full-color LED touchscreen for easy operation and switching between laser types.
- Versatility: Can engrave, score, and cut various materials, including wood, metal, plastic, and ceramics.
- Accessories: Offers optional extensions like a slide extension for larger work areas and a rotary attachment for cylindrical objects.
- Automatic Laser Switching: The machine automatically selects the appropriate laser based on the material, simplifying the engraving process.
Negative Sides of LaserPecker 4
- Software Issues: The LaserPecker app, still in beta, has reliability issues and lacks comprehensive material presets, which can be challenging for beginners.
- Assembly Required: Unlike some competitors, it requires assembly, which may be inconvenient for some users.
- Limited Work Area: Despite the compact design, the base model has a relatively small work area (160 mm x 120 mm), which may not suffice for larger projects without extensions.
- High Cost: Although it offers advanced features, it is relatively expensive, especially when adding necessary extensions and accessories.
Evolution from LaserPecker 3
The LaserPecker 4 represents a significant upgrade from the LaserPecker 3, introducing several new features and improvements:
- Dual-Laser System: Unlike the LaserPecker 3, which uses a single 5W diode laser, the LaserPecker 4 incorporates both a 10W blue diode laser and a 2W infrared laser, enhancing its versatility and material compatibility.
- Increased Speed and Precision: The LaserPecker 4 offers a higher engraving speed (2000 mm/s vs. 600 mm/s) and greater precision (0.003 mm vs. 0.01 mm).
- Larger Engraving Area: With optional extensions, the LaserPecker 4 can handle larger projects compared to the smaller engraving area of the LaserPecker 3.
- Advanced Features: The LaserPecker 4 includes new functionalities like automatic laser switching, enhanced safety features, and better software integration, including compatibility with LightBurn.
Comparison Summary with xTool F1
LaserPecker 4 vs. xTool F1
- Laser Power: LaserPecker 4 features a 10W blue diode laser and a 2W infrared laser, whereas xTool F1 typically uses a single powerful laser (CO2 or diode).
- Engraving Speed: LaserPecker 4 has a maximum engraving speed of 2000 mm/s, while xTool F1’s speed varies but is often competitive.
- Material Compatibility: Both machines are versatile, but LaserPecker 4’s dual-laser system offers broader material compatibility, especially for detailed leather engraving.
- Work Area: LaserPecker 4 has a smaller base work area but can be extended with accessories, while xTool F1 usually offers a larger fixed work area.
- Software: LaserPecker 4’s app is in beta and has reliability issues, whereas xTool F1 benefits from more established software like xTool Creative Space and LightBurn.
- Price: LaserPecker 4 is priced competitively but may require additional purchases for extensions, making it comparable in total cost to the higher-priced xTool F1.
- User Experience: LaserPecker 4 is compact and portable, ideal for small spaces and hobbyists, while xTool F1 is often more suited for larger setups and professional use due to its robust build and software support.
xTool S1
The xTool S1 laser engraver has captured the market’s attention by offering capabilities traditionally associated with more expensive CO2 laser machines. This next-generation laser cutter and engraver brings innovation with its 40W diode laser power and the ability to switch between interchangeable laser heads. Its standout features include a 600 mm/s engraving speed, 20 mm pinewood cutting ability in a single pass, and the unique capability for curved engraving.
The S1 is designed with user safety in mind, earning a Class-1 safety certification which negates the need for protective eyewear.
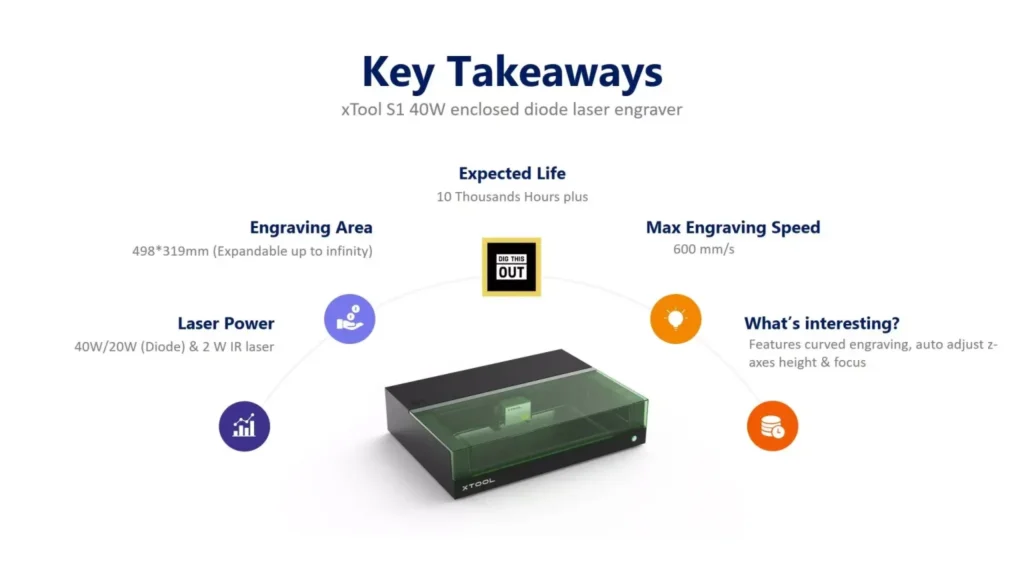
Visit our analysis on Specifications, comparison, and Official price of S1.
Positive Aspects of the xTool S1
- Affordability and Premium Features: Priced under USD 2000, the S1 offers advanced features such as curved engraving, high-speed engraving, and precise spot accuracy.
- Flexibility: The interchangeable laser heads allow for a range of engraving tasks, from wood to metal, increasing its versatility.
- Safety: The S1’s Class-1 safety certification, combined with features like flame detection and emergency stop, ensures a safe operating environment.
- Performance: With a 600 mm/s engraving speed and the ability to cut 20 mm pinewood in a single pass, the S1 competes with higher-end CO2 lasers.
- Expandability: The S1 is upgradable with a riser base, rotary attachments, and an automatic conveyor feeder, providing extended functionality.
Negative Aspects of the xTool S1
- Absence of Camera-Based Positioning: The lack of a camera may be challenging for new users accustomed to camera-based systems, though the twin-point positioning system offers a precise alternative.
- Slower Movement: The S1’s laser head moves with the gantry, making it slower compared to models like the F1 Ultra that use galvanometer technology.
- Manual Laser Head Switching: Unlike the automatic switching in the F1 lasers, the S1 requires manual changes between laser heads.
- No Preview Screen: The absence of a preview screen might be a drawback for users who rely on visual confirmations before engraving.
Comparison Summary: xTool S1 vs. xTool P2
Laser Type and Functionality:
- xTool S1: Features a combination of a 40W diode laser and a 2W infrared laser, capable of engraving a wide variety of materials, including metals.
- xTool P2: Equipped with a 55W CO2 laser, primarily designed for professional use, capable of handling materials like wood, rubber, and fabric.
Cutting Ability:
- xTool S1: Cuts up to 18 mm of solid wood and various other materials with precision, thanks to its 40W laser power.
- xTool P2: Capable of cutting 20 mm of acrylic in a single pass and offers a larger work area compared to the S1.
Engraving Performance:
- xTool S1: Superior in versatility, allowing engraving on metals with its IR laser, and features a precise twin-point positioning system.
- xTool P2: Excels in speed and precision, utilizing a camera-based positioning system for ease of use.
Safety:
- xTool S1: Boasts a Class-1 safety certification, comprehensive flame detection, and emergency stop features.
- xTool P2: Lacks the same level of integrated safety features as the S1 but remains a robust professional tool.
Atomstack A24 Pro
The Atomstack A24 Pro is part of Atomstack’s new generation of A-series machines, showcasing significant improvements over its predecessors. This powerful and affordable laser engraver has quickly become a favorite for enthusiasts and professionals alike, particularly for those working with leather.
The Atomstack A24 Pro is equipped with a powerful 24W laser, making it highly effective for cutting and engraving leather. Its small laser spot size of 0.06 x 0.06mm ensures precise and detailed work, crucial for leather projects that require intricate designs. Additionally, its sturdy aluminum frame and advanced features like crosshair guides and integrated cable management make it a reliable and efficient choice for leather engraving.

Check Atomstack’s specs, comparison, and official price.
Positive Aspects of the Atomstack A24 Pro
- Powerful Laser: The 24W laser can cut through 12mm of pine and 8mm of black acrylic in just a few passes, providing impressive cutting and engraving capabilities.
- Precision: With a spot size of 0.06 x 0.06mm and a maximum resolution of 423 DPI, the A24 Pro offers detailed and accurate engraving, comparable to CO2 lasers.
- Sturdy Build: The one-piece aluminum frame ensures stability and durability, crucial for maintaining precision over time.
- Affordability: Despite its advanced features, the A24 Pro is priced competitively, offering excellent value for its capabilities.
- Expandability: Supports various accessories like rotary attachments, air assist, and offline controllers, enhancing its functionality.
- Convenience Features: Includes limit switches on all sides, crosshair guides, and integrated cable management, making it user-friendly.
Negative Aspects of the Atomstack A24 Pro
- Limited Work Area: The work area is 365 x 305 mm, which may be smaller than some other 20W and 24W engravers.
- Manual Laser Focus: Requires manual adjustment for focusing, which might be less convenient compared to auto-focus systems.
- No Camera: Lacks a camera for positioning, which could be a drawback for users who prefer visual alignment.
Comparison with Other Laser Machines
When compared to other 20W and 24W lasers, such as the xTool D1 Pro, the Atomstack A24 Pro stands out for its affordability and precision. While the xTool D1 Pro may offer a larger work area and auto-focus features, the A24 Pro provides a smaller, more focused laser spot, allowing for finer engraving details. Additionally, the A24 Pro’s price point makes it a more accessible option for hobbyists and small businesses, targeting users who need professional-grade performance without the higher cost.
Overall, the Atomstack A24 Pro offers a balanced combination of power, precision, and affordability, making it an excellent choice for those looking to work with leather and other materials.
Atezr P10 Combo
The Atezr P10 is an open-frame laser cutter equipped with a 5W diode laser and a wide gantry. It requires assembly, with a rotary roller and air assist kit included for enhanced productivity.
Known for its engraving accuracy of 0.004 inches due to compressed spot technology, the P10 can handle a wide range of materials including leather, wood, metal, stainless steel, ceramics, and glass. Its versatility and precision make it an excellent tool for various creative projects.
The P10 stands out for engraving leather due to its fine compression spot size, built-in air assist, and user-friendly features like the Atezr Laser App and precise anti-collision positioning.
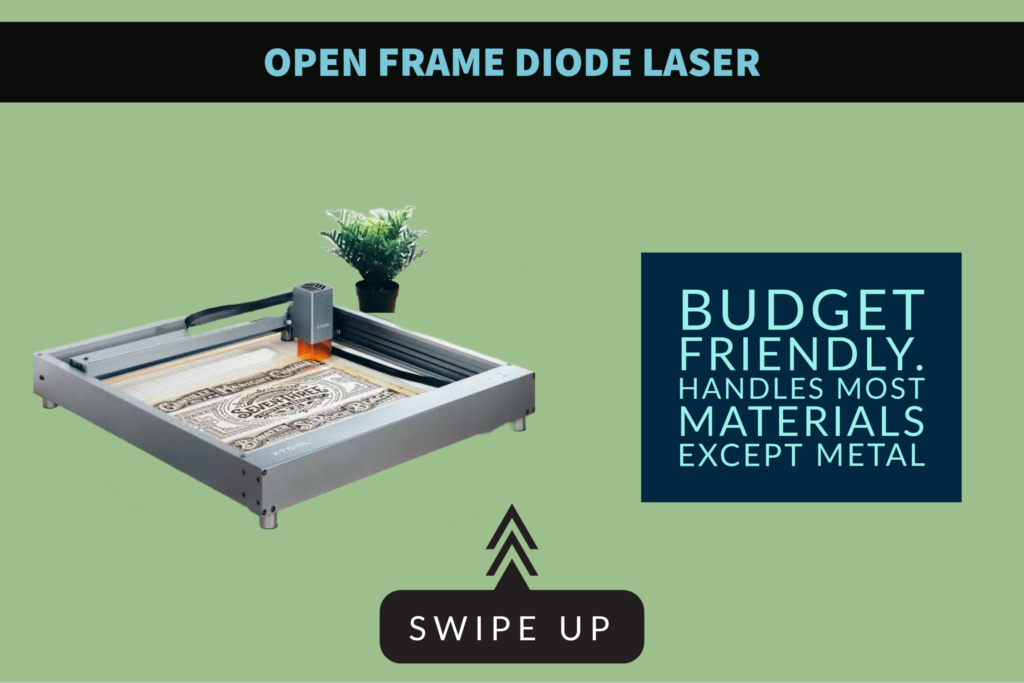
Check price and other details of Atezr P10 here.
Positive Sides of Atezr P10
- High Precision: The ultra-fine compression spot size of 0.08 x 0.06 mm allows for detailed and accurate engraving, essential for intricate designs.
- Versatility: Can engrave and cut a wide range of materials including wood, leather, metal, stainless steel, ceramics, and glass.
- User-Friendly: Features like the Atezr Laser App, flame-retardant filter glass, and precise anti-collision positioning make it easy and safe to use.
- Rotary Roller and Air Assist: Enhances productivity by allowing for engraving on cylindrical objects and maintaining a cleaner work area.
- Quick Assembly: Thoughtful packaging and clear instructions make the assembly process straightforward and quick, typically around 10 minutes.
- Large Work Bed: Offers a substantial work area of 430 x 430 mm, accommodating larger projects or multiple smaller ones simultaneously.
Negative Sides of Atezr P10
- Assembly Required: The machine arrives knocked down and requires assembly, which might be intimidating for novice users.
- No Built-in Camera: Precise material placement can be challenging without a built-in camera, requiring manual adjustment and trial-and-error.
- Additional Costs: Some features like the magnetic honeycomb bed need to be purchased separately, adding to the overall cost.
- Belt Tension Adjustment: The gantry belts arrive taut, which might require adjustment by the user for optimal performance.
Comparison Summary with xTool D1 Pro
- Build Quality: Atezr P10 has a sturdy metal body, ensuring durability and longevity, whereas xTool D1 Pro’s body material is unspecified.
- Noise Level: Atezr P10 operates 15 decibels quieter than xTool D1 Pro, making it more suitable for home or small office environments.
- Value for Money: Atezr P10 includes features like Air Assist and Rotary Roller in the base price, while xTool D1 Pro requires additional costs for these features.
- Price: Atezr P10 is approximately $100 cheaper than xTool D1 Pro, offering more economical value with similar or better features.
- Connectivity: xTool D1 Pro offers Ethernet connectivity, which is absent in Atezr P10.
Comparison Summary with Atezr P20
- Power: Atezr P10 has a machine power of 60W and a laser electric power of 40W, while the P20 boasts 120W machine power and 90W laser electric power.
- Laser Output: Atezr P10’s laser module output is 10-12W compared to P20’s 20-24W, making P20 more powerful for deeper and faster engraving.
- Efficiency: P20’s higher power leads to quicker engraving and cutting times, beneficial for dense materials and detailed designs.
- Energy Consumption: P20’s increased power results in higher energy use and potentially faster wear and tear.
- Safety and Handling: Both models feature a fixed focus lever for easy use, but P20’s higher power may require more careful handling and safety precautions.
Which types of laser machine would you choose for leather?
In a nutshell, there are 3 major types of laser (CO2, diode, and fiber); the CO2 and diode laser are most suited to leather.
A CO2 laser would be a little expensive option but it helps to work with diverse materials if compared with the diode lasers.
In leather engraving – you should keep in mind that most leather has substantial water content and a powerful laser like the CO2 laser can cause other areas to shrink because excessive power dries out the water and the shape of leather shrinks automatically.
For the artificial leather, excessive laser power can cause over burn so, using the least power setting is always recommended.
Diode lasers work well with laser engraving but most diode lasers come without fume extractors, which can be a serious trouble for engraving leather.
Apart from that, in both CO2 and diode lasers, you can always control the laser engraving settings from Lightburn or any other software you are using.
Make sure to use 20% laser power with minimal line interval.
You may reach engraving speed up to 400 mm/s which does not affect the job at all. However, the slower it works, the more it will burn the leather patches. So, you need to understand your optimum settings since all leather patches are not the same all around the world.
Another tip: Always buy a laser machine that accompanies an air assist kit. An air assist provides continuous airflow to the laser head that protects the laser from excess burn and it helps in removing odors away.
What types of leather can you laser engrave?
When it comes to laser engraving leather, different types offer varying qualities and results. Full-grain leather, known for its durability and rich patina, provides excellent engraving depth and precision, making it ideal for high-end products.
Top-grain leather, smoother and more flexible, also engraves well but requires less power, producing clear and detailed results. Genuine leather, while affordable, delivers moderate engraving quality and requires careful power adjustments to avoid inconsistency. Bonded leather, the most economical, often contains synthetic elements that can affect engraving precision and durability.
Read more on the types of leather.
How would you clean leather after engraving?
Cleaning leather after engraving involves a few crucial steps to ensure that the material remains pristine and the engraving looks sharp. Start by gently dusting the engraved area with a soft brush or cloth to remove any loose particles.
Next, use a lightly dampened cloth to wipe away soot and fine particles without soaking the leather. Apply a small amount of leather cleaner on a cloth and gently rub it in circular motions over the engraved area.
If there are adhesive residues, use a bit of adhesive remover or rubbing alcohol on a cloth to carefully dab the affected spots, then wipe with a damp cloth to remove any remaining solution. Finally, apply a leather conditioner to restore moisture and keep the leather supple.
How to seal leather after engraving?
To seal leather after engraving, start by thoroughly cleaning the leather to remove any dust and debris.
Choose the appropriate sealant based on your leather type and environmental conditions—acrylic for general use, wax for a matte finish, or oil for deep penetration and flexibility.
Apply the sealant evenly using a soft cloth or brush, ensuring full coverage, including the edges. Allow it to dry completely according to the manufacturer’s instructions, and consider applying multiple coats for extra protection. Finally, maintain the sealed leather by regular cleaning and reapplication as needed to keep it protected and looking its best.
What are the challenges in leather engraving?
During leather engraving, you may face challenges such as fumes, moisture, color variations, and many more.
We have listed the challenges for you briefly so that you can plan well ahead with your leather engraving job.
- Material Variability: Different types of leather, such as full-grain, top-grain, and bonded leather, have varying properties that can affect the engraving outcome. Each type may respond differently to the engraving process, requiring adjustments and experimentation.
- Heat Sensitivity: Leather is sensitive to heat, and excessive heat during the engraving process can cause burning, warping, or discoloration. Finding the right balance of power and speed settings on the laser engraver is crucial to avoid damaging the material.
- Fumes and Odor: Engraving leather generates fumes and a strong odor, which can be unpleasant and potentially harmful if proper ventilation is not maintained. It’s essential to have a well-ventilated workspace and use appropriate safety measures.
- Surface Texture: The natural texture and grain of leather can affect the consistency and clarity of the engraved design. Irregularities in the surface can lead to uneven engraving results.
- Resolution and Detail: Achieving high-resolution and detailed engravings on leather can be challenging due to the material’s fibrous nature. Fine details may not always translate well, requiring adjustments to the design and engraving settings.
- Moisture Content: Leather contains natural oils and moisture that can affect the engraving process. Variations in moisture content can lead to inconsistent results, necessitating careful preparation and testing.
- Color Variations: Different leathers and even different areas of the same piece of leather can have color variations that impact the visibility and contrast of the engraved design. This requires consideration when selecting the leather for a specific project.
- Maintenance of Equipment: Engraving leather can produce residue that accumulates on the laser engraver’s lens and other components, potentially affecting performance. Regular maintenance and cleaning of the equipment are necessary to ensure optimal results.
- Skill and Experience: Mastering leather engraving requires a combination of technical knowledge and artistic skill. Operators need to understand both the capabilities of their engraving equipment and the characteristics of the leather they are working with to achieve high-quality results.
How to handle edge-burning?
Edge-burning is a common issue when engraving leather with a laser machine. Here are some tips to minimize it:
- Adjust Power and Speed: Lower the power and increase the speed of the laser. This reduces the amount of heat applied to the leather, minimizing burning.
- Use Masking Tape: Cover the engraving area with masking tape before starting. The tape absorbs some of the heat, protecting the leather’s surface.
- Optimize Focus: Ensure the laser is properly focused. A sharp focus can create cleaner cuts and reduce the chances of burning.
- Proper Ventilation: Make sure your work area is well-ventilated. This helps to quickly dissipate heat and smoke, preventing it from settling on the leather.
- Test Settings: Always test on a scrap piece of leather before working on your main project. Adjust settings as needed based on the results.
How can you minimize fumes?
The best way to minimize fume while engraving leather is to use a separate fume extractor.
You may buy the fume extractor additionally or, use a laser machine that comes with an in-built fume extractor such as xTool F1 or xTool P2.
In xTool P2, you will see a duct pipe through away the fumes somewhere else with the help of fan.
However, budget-friendly laser machines such as Atezr P10, or the Atomstack won’t come with a fume extractor and you need to buy this separately.
What if you see white markings after leather engraving?
You may see some white marks after laser engraving especially if your leather contains a heavy amount of water element.
To solve this, you should not use much laser power. Try starting with 15% power and 200 mm/s.
Remember, dried leather would contain at least 10% water and the other types would contain more.
Moreover, white markings also happen due to residue left on the surface. Here’s how to address it:
- Clean the Surface: Use a damp cloth to gently wipe away the residue. For stubborn marks, a small amount of rubbing alcohol on the cloth can help.
- Adjust Laser Settings: White markings might indicate too much power or incorrect speed settings. Lower the power or increase the speed to achieve a cleaner finish.
- Masking Tape: Apply masking tape over the engraving area before starting. This can help reduce residue and protect the leather.
- Leather Conditioner: After engraving, apply a leather conditioner to restore the leather’s natural look and feel.
How to choose laser power and engraving speed?
Choosing the right laser power and engraving speed for leather depends on the type of leather you’re working with. Here’s a quick guide:
- Full-Grain Leather: Requires higher power and moderate speed due to its thickness. Start with 70-80% power and 300-400 mm/s speed.
- Top-Grain Leather: Slightly thinner, needing less power. Try 60-70% power and 400-500 mm/s speed.
- Genuine Leather: More processed, so use moderate power and higher speed. Begin with 50-60% power and 500-600 mm/s speed.
- Suede: Softer and thinner, requiring less power. Use 40-50% power and 600-700 mm/s speed.
- Bonded Leather: Made from leather scraps, use lower power. Start with 30-40% power and 700-800 mm/s speed.
Always test on a small piece first to fine-tune settings for the best results.
How to choose the air pressure of your assist kit?
Choosing the correct air pressure for your assist kit when engraving leather is crucial for achieving clean results. Here’s a quick guide based on different leather types:
- Full-Grain Leather: Requires moderate air pressure to prevent scorching. Start with 15-20 PSI.
- Top-Grain Leather: Needs slightly lower pressure. Use around 10-15 PSI.
- Genuine Leather: Optimal with moderate pressure. Set to 12-18 PSI.
- Suede: Delicate, requiring low air pressure to avoid damage. Use 8-12 PSI.
- Bonded Leather: Can handle a bit more pressure due to its composition. Start with 15-20 PSI.
Adjust the air pressure according to your specific setup and always perform a test run to ensure the best results.
Which software will you use for leather engraving?
When it comes to leather engraving, selecting the right software can make a significant difference. Here’s a quick guide:
- Adobe Illustrator: Ideal for creating detailed and intricate designs. Compatible with most laser engraving machines.
- CorelDRAW: Known for its versatility and user-friendly interface, making it great for both beginners and professionals.
- LightBurn: Offers precise control over laser settings, ensuring high-quality engraving results.
- RDWorks: Works well with Ruida controllers, providing robust functionality for various engraving tasks.
- Inkscape: A free and open-source option, perfect for creating and editing vector graphics.
- EZCAD: Commonly used with fiber lasers, offering detailed control over engraving parameters.
- LaserGRBL: Simple and effective, suitable for basic engraving tasks and hobbyists.
Choose the software that best fits your needs and ensure it is compatible with your laser engraving machine. Always test settings on a small piece of leather first to achieve the best re
How can you improve engraving designs?
Improving engraving designs involves considering both design aspects and the type of engraving used. Here’s how to enhance your leather engraving projects:
- Design Clarity: Use high-resolution images for raster engraving to ensure clear and detailed results. This works well with Full-Grain Leather and Top-Grain Leather for intricate patterns.
- Vector Precision: For sharp and clean lines, vector designs are ideal. Use software like Adobe Illustrator or CorelDRAW for creating vector graphics. This method is excellent for Genuine Leather and Suede.
- Contrast and Depth: Adjust the contrast in your design to enhance visibility. High-contrast designs are particularly effective on Bonded Leather due to its varied composition.
- Layering: Create multi-layered designs to add depth and dimension. This technique can make engravings on Full-Grain Leather and Top-Grain Leather stand out.
- Line Weight: Vary the line weight in your vector designs to add detail and texture. This is especially useful for Genuine Leather and Suede, providing a richer, more detailed finish.
Bottom Line
Leather engraving using the laser machine is profitable. You need to understand the different settings and Lightburn parameters depending on the type of leather.
We always suggest you use an air assist kit while engraving leather so that the precision and accuracy do not strain.
